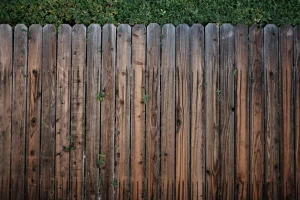
As a guy who loves taking on DIY projects, I decided that building some fencing around my garden would be my next big challenge. Little did I know, this seemingly straightforward task would become a journey full of learning experiences, mistakes, and small victories. In this guide, I’ll walk you through the process of building a fence, sharing the tools I used, the materials I selected, and, most importantly, the lessons I learned along the way.
Starting With The Basics: Tools & Materials
When I first started, I had little idea of what tools were necessary for fencing. My initial assumption was that all I needed were some wooden posts, nails, and a hammer. How wrong I was! It turns out that building a fence requires more than just basic tools.
Tools I Used:
- Post Hole Digger: Essential for digging deep enough holes for the fence posts.
- Spirit Level: To ensure the posts were perfectly vertical (this became very important later on).
- Hammer: A DIY staple, but make sure you have a good quality one.
- String Line: A simple tool that I initially overlooked but soon realised was crucial.
- Saw: For cutting the fence panels to the right size.
- Rapid Set Concrete: More on this later, but it’s a lifesaver for setting posts quickly.
- Rust-Resistant Nails: A mistake I made that you can avoid—don’t skimp on nail quality.
When it comes to materials, I opted for wooden panels. Wood is classic and gives a natural look, but it requires careful selection. I learned to choose treated wood to prevent rot and decay, which is especially important in the often damp British climate.
Step One: The Importance Of Planning Your Fencing Patterns & Layout
Before diving into the actual building, I needed to plan the layout of the fence. This involved deciding on the pattern (straight panels versus alternating) and the spacing between the posts. As someone who’s more comfortable with a hands-on approach, I found this planning phase a bit tedious but necessary.
One of my first mistakes was not using a string line. In my eagerness to start, I eyeballed the placement of the posts. It seemed fine at first, but as I started putting up the panels, I realised that the posts didn’t line up. This was a major setback, but fortunately, I hadn’t set the posts in concrete yet. I had to remove them all, align them properly with the string line, and start again. Lesson learned: always use a string line to ensure everything is perfectly straight.
Step Two: Fence Post Setting
Once the posts were correctly aligned, it was time to set them in place. I naively thought that simply packing soil around the posts would be sufficient. After all, the posts seemed sturdy enough without any extra support. However, as soon as I attached the panels, the posts started wobbling. It became clear that I needed a stronger foundation.
Enter rapid set concrete. This material was a game changer for me. It sets quickly, which means you don’t have to stand around holding the posts in place for ages. After resetting the posts with rapid set concrete, they were rock solid. I highly recommend not skipping this step—it makes a world of difference in the stability of your fencing.
Step Three: Fencing Fixings & The Nail Mistake
When it came to fixings, I initially thought any nails would do the job. The process seemed simple enough—hammer in a few nails to secure the fence panels to the posts, and that would be it. I had some old nails in the garage and figured they’d work just fine. So, I went ahead and started nailing the panels in place, feeling pretty satisfied with my progress.
However, after a few rainy days, I started noticing some troubling signs. The nails had begun to rust, leaving unsightly stains on the wood and, worse, weakening the overall structure of the fencing. It became clear that my choice of nails wasn’t up to the task. I had to go back and remove all the rusted nails, then replace them with high-quality, rust-resistant ones. It was a tedious process, but a necessary one. The lesson here is clear: don’t cut corners on fixings. From the start, invest in high-quality, rust-resistant nails to ensure your fence stands the test of time.

Step Four: Painting The Fence.. A Preemptive Step I Missed!
When it came to painting the fence, I envisioned getting the panels up and then giving them a fresh coat of paint, which would add the perfect finishing touch. The process seemed straightforward: build the fence first, paint it later. So, I focused on assembling the panels, figuring I’d save the painting for the end.
What I didn’t anticipate was how difficult it would be to paint the fence once it was fully assembled. Trying to reach all the nooks and crannies while avoiding drips and splatters became a real challenge. I also ended up with paint on the surrounding garden area, which was frustrating. Looking back, I realised it would have been far easier and cleaner to paint the panels before putting them up. Pre-painting the panels would have allowed for a more even coat and saved me a lot of hassle. If you’re planning to paint your fence, I highly recommend taking the time to paint the panels beforehand—it’s a step that’s well worth the effort.
Final Thoughts & Lessons Learned
Building a fence is more challenging than it seems, especially for someone like me who’s more of an amateur than a professional. However, it’s also incredibly rewarding to see the finished product standing tall in my garden, knowing that I built it with my own hands.
The key takeaways from my experience are:
- Always Use A String Line: It ensures your posts are perfectly aligned.
- Don’t Skimp On Concrete: Rapid set concrete makes your fence sturdy and secure.
- Invest In Quality Nails: Rust-resistant nails will save you time and effort in the long run.
- Paint Before Assembly: This will save you a lot of trouble and mess later on.
For any homeowner or aspiring DIY-er looking to build their own fence, I hope my story helps you avoid some of the pitfalls I encountered. With a bit of planning, the right tools, and some patience, you can build a fence that not only enhances your garden but also gives you a sense of accomplishment.